

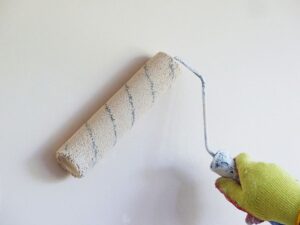
House painting is, most of the time, a more difficult task than you could have imagined before starting since it usually involves numerous extra steps. The most important is protecting your furnishings before and during the actual process. This normally takes quite some time, but you shouldn’t skip it or take fewer precautions, so you wouldn’t regret it afterward. This is why we asked experts to help us understand what we should do to make sure that our armchairs, sofas, tables, cabinets, and carpets are kept intact after the walls are painted.
Home & Business Services, or HBSOnTime.com in short, is a family-owned local business operating in the Greater Fredericksburg Area, VA. Apart from house painting, they also offer professional cleaning (residential, commercial, air duct, carpet, window), home maintenance (power washing, gutter cleaning, junk removal, yard work), handyman services (carpentry, ceiling, drywall, deck, fence, door, floor, insulation installation/repair), as well as turnkey services. They operate within a 50-mile radius from the big city, including the counties of Culpeper, Orange, Spotsylvania, Stafford, Louisa, King George, and Caroline.
Without further ado, let’s see what you should take care of if you decide to opt for house painting, to make sure that the walls will look better after the process, and everything else will look the same, not stained or damaged:

- Cover or remove furniture. The first step, of course, is removing all the furnishings from the room. If it’s not possible, they should be at least covered and grouped in the middle of the room. The plastic covers should be secured with masking tape. The workspace between the furnishings and the wall has to be at least 3 feet;
- Protect the floor. The classic newspaper, put on the floor when house painting, should instead be replaced by drop cloths and rosin paper. Some contractors could even suggest laying a plastic sheet on the floor, for extra protection against heavy spills. It goes without saying that you should clean anything up before it dries or soaks through.
- Remove the paintings and wall fixtures. It’s not at all recommended to leave the paintings and wall fixtures into place and paint around them because, when they move, they will expose the bare spots around them. Therefore, take down anything that can be taken down (except for, maybe, mirrors or cabinets screwed onto the walls).
- Remove the electrical outlet covers. Another crucial step before house painting has to do with removing the electrical outlet covers. Sensitive wiring should be protected since even a little paint in the wrong places could mess it off. It goes without saying, but make sure that the power is off before touching any wirings.
- Remove the ceiling light fixtures. Last but not least, the ceiling light fixtures should be removed before painting the ceiling. All in all, if you respect all these steps, you can make sure that the paint job will be immaculate, both literally and figuratively.